

Android Camera Takes Blurry Photos Only When Switching Between Lenses? Fix Focus and Lens Problems

Introduction

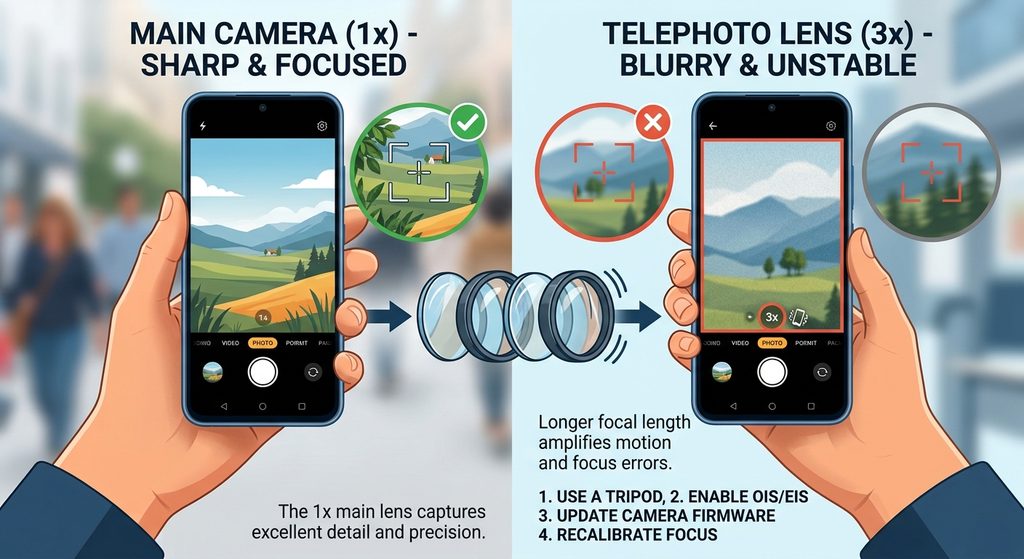
Have you noticed that your Android phone takes clear photos with its main camera but produces blurry images when you switch to the ultrawide or telephoto lens? You might see the picture become soft, lose detail, or struggle to focus for a few seconds after tapping a different zoom option. In some cases, the camera may repeatedly shift between clear and blurry images without settling on a sharp subject.

This problem can be frustrating, especially when you are trying to photograph moving objects, capture a landscape, or take close-up pictures. The good news is that blurry photos after switching camera lenses do not always indicate hardware damage. The issue may be related to autofocus behaviour, lighting conditions, fingerprints on the camera glass, camera app settings, or the way your phone changes between its available lenses.

Different Android phones use different camera systems. Some models have separate main, ultrawide, and telephoto cameras, while others rely on digital zoom or software processing for certain zoom levels. As a result, the steps that solve the problem on one phone may not work exactly the same way on another.

This guide explains how to troubleshoot the Android camera blurry after switching lenses problem using practical checks you can perform at home. Follow the steps in order, starting with the simplest solutions before considering more advanced troubleshooting.

1. Understand Why Your Android Camera Becomes Blurry After Switching Lenses

Before changing settings, it helps to understand what happens when you switch camera lenses.

Many Android phones automatically select a different camera depending on the zoom level, available light, and distance from the subject. For example, tapping 0.5x may activate an ultrawide camera, while selecting 3x on a phone with a dedicated telephoto camera may activate that lens.

Each camera can have different focus capabilities, sensor sizes, and image-processing behaviour. When you switch lenses, the phone may need a moment to adjust focus, exposure, and image processing.

Common reasons for blurry photos

The most frequent causes include:

  • Autofocus delays: The selected camera needs time to lock focus on the subject.
  • Dirty camera glass: Fingerprints, dust, or oily marks reduce image clarity.
  • Poor lighting: A secondary lens may perform worse in dim environments.
  • Minimum focusing distance: The selected camera cannot focus properly when the subject is too close.
  • Camera app glitches: Temporary software problems interfere with lens selection or focusing.
  • Physical damage: A scratched lens cover, damaged autofocus mechanism, or internal camera fault can affect sharpness.

A brief blur immediately after switching lenses can be normal. However, if the camera remains blurry after several seconds, repeatedly hunts for focus, or produces consistently unclear images with one particular lens, further troubleshooting is worthwhile.
2. Clean the Camera Glass and Remove Anything Blocking the Lens

One of the easiest causes to overlook is a dirty camera cover. Because many phones have several cameras grouped closely together, it can be difficult to notice which lens is affected.

Your main camera may remain clear while fingerprints or dust on the ultrawide or telephoto camera cause blurry results after switching lenses.

Step-by-step cleaning instructions

  1. Close the Camera app.
  2. Inspect the camera module under good lighting.
  3. Look for fingerprints, dust, oily marks, scratches, or moisture.
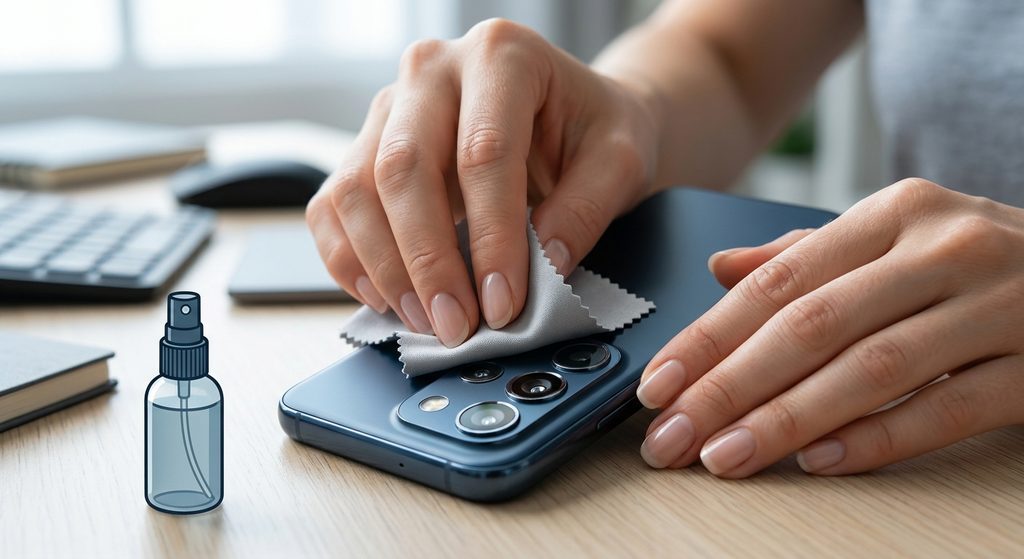
  4. Use a clean, soft microfiber cloth to gently wipe the camera glass.
  5. If you use a protective camera lens cover, check whether it is dirty, scratched, loose, or poorly aligned.
  6. Open the Camera app again and test each available lens.

Avoid using rough fabrics, abrasive cleaners, or excessive pressure. Do not spray liquid directly onto the camera module.

Check your phone case

Some protective cases have openings that do not align properly with every camera. A thick case, decorative camera ring, or poorly fitted lens protector may partially obstruct a secondary camera.

Remove the case temporarily and take a few test photos. If the images become clearer, inspect the case or lens protector before replacing it.

Tip: Clean the camera glass before testing any software changes. Otherwise, you may spend time adjusting settings when the actual problem is a simple obstruction.
3. Test Each Camera Lens Separately

If the camera becomes blurry only after switching lenses, identify which lens causes the problem. This makes troubleshooting much easier and helps distinguish a general camera app issue from a possible hardware fault.

How to test your Android camera

  1. Open the default Camera app.
  2. Find a stationary subject, such as a book cover, a product box, or a sign.
  3. Move to a well-lit location.
  4. Keep the phone at a comfortable distance from the subject.
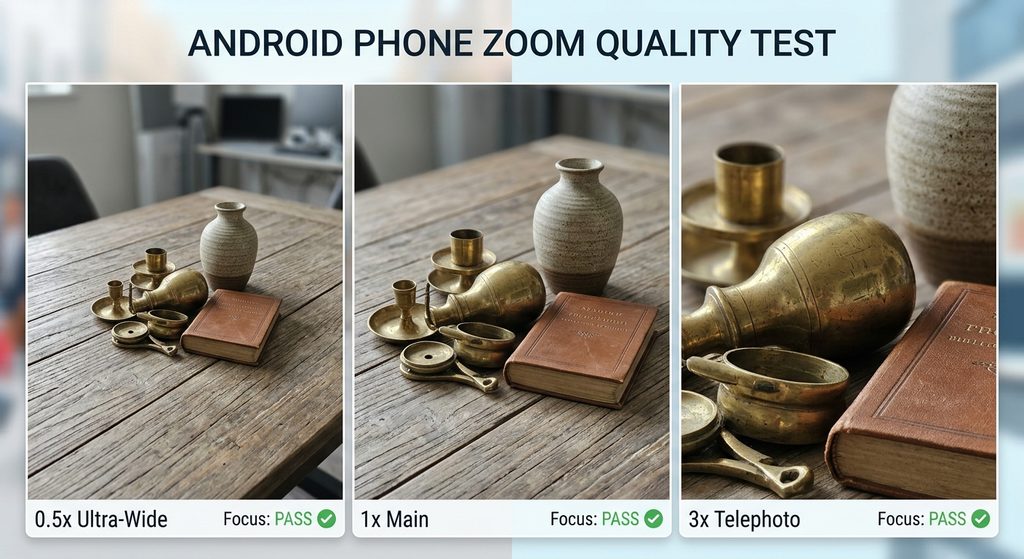
  5. Take a photo using the default 1x setting.
  6. Switch to 0.5x, if available, and take another photo.
  7. Test 2x, 3x, or another available zoom setting.
  8. Compare the images at the same viewing size.

Not every zoom setting represents a separate physical lens. On some phones, 2x zoom uses a crop of the main camera image rather than a dedicated camera module.

What your results may indicate

  • Only the ultrawide camera is blurry: Check its glass, lighting performance, and focusing limitations.
  • Only the telephoto camera is blurry: Test in brighter conditions and at a greater subject distance.
  • Every lens becomes blurry temporarily: Investigate autofocus behaviour, camera app glitches, and software updates.
  • One lens is always blurry: A lens-specific hardware or software problem becomes more plausible.
  • The preview looks blurry but the saved photo is sharp: The issue may involve preview processing rather than the final image.

Do not judge a camera solely by comparing images taken at different zoom levels. Each camera may capture different amounts of detail, particularly in low light.
4. Give Autofocus Time to Lock on the Subject

Autofocus automatically adjusts the camera to make a subject appear sharp. When switching lenses, the phone may need to refocus because each camera has different focusing characteristics.

This can be particularly noticeable when photographing objects close to the phone.

Try the following focus test

  1. Open the Camera app and select the lens that produces blurry photos.
  2. Point the camera at a stationary object in good lighting.
  3. Tap the main subject on the screen to request focus.
  4. Keep the phone steady for two or three seconds.
  5. Take the picture once the subject appears sharp.

If the subject becomes clear after tapping the screen, the issue may be related to autofocus selection or the camera’s initial focus behaviour.

Move farther away from close objects

Different camera lenses have different minimum focusing distances. An ultrawide camera, telephoto camera, and main camera may not focus at the same distance.

For example, if you move your phone very close to a flower and switch from 1x to 3x, the new camera may be unable to focus at that distance.

Try moving the phone farther away and tapping the subject again. If the image becomes sharp, you may have encountered a focusing-distance limitation rather than a fault.

Some phones automatically switch to a macro-capable camera when you move close to an object. If your Camera app offers a macro control, test it both on and off.

When autofocus repeatedly hunts

If the image alternates between clear and blurry without settling, test a stationary subject in bright light. Persistent focus hunting across several attempts may indicate a camera software issue or a problem with the autofocus mechanism.

Avoid repeatedly shaking or tapping the phone to force it to focus.

5. Check Lighting Conditions Before Blaming the Lens

A secondary camera can produce noticeably softer images in dim environments. This happens because different camera modules may have smaller sensors, narrower apertures, or different image-processing capabilities.

When the available light decreases, the phone may increase exposure time, apply stronger noise reduction, or switch to another camera automatically.

Test the camera in bright daylight

Take the same photo in two conditions:

  • Bright conditions: Photograph a stationary subject near a window or outdoors in daylight.
  • Dim conditions: Photograph the same subject indoors under weaker lighting.

Compare the results after switching lenses.

If the secondary lens performs well in bright light but becomes blurry indoors, lighting limitations or longer exposure times may be contributing to the problem.

Keep the phone steady

Low-light photography can make even small hand movements visible in the final picture. Hold the phone with both hands and pause briefly before taking a photo.

If your Camera app offers a night mode, try it with a stationary subject. Remember that night mode may take longer to capture and process an image.

Also check whether the camera automatically switches to digital zoom in low light. Digital zoom enlarges part of an image and may reduce detail compared with a dedicated optical telephoto camera.

Important: If a lens remains consistently blurry in bright daylight while the other lenses produce sharp images, lighting alone is unlikely to explain the entire problem.

6. Restart the Camera App and Clear Its Cache

A temporary camera app glitch can interfere with focusing, lens switching, or image processing. Restarting the app is a useful next step if cleaning the lens and testing autofocus have not helped.

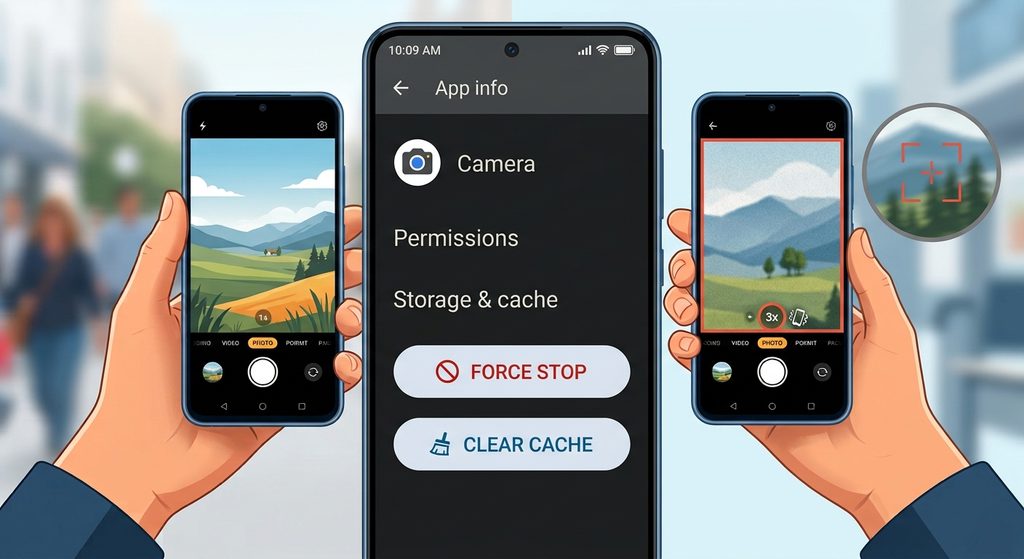
Force-stop the Camera app

Android menu names differ by manufacturer, but the general process is:

  1. Open Settings.
  2. Select Apps or Apps management.
  3. Find and open Camera.
  4. Tap Force stop.
  5. Confirm if prompted.
  6. Open the Camera app again and test the affected lens.

This closes the app so you can start a fresh camera session.

Clear the Camera app cache

If the issue continues:

  1. Open Settings.
  2. Go to Apps > Camera.
  3. Select Storage or Storage and cache.
  4. Tap Clear cache, if available.
  5. Reopen the Camera app and test the lenses again.

Clearing the cache removes temporary files. It is different from clearing storage or app data, which may reset camera preferences and other app settings.

Start with the cache option. Before clearing app data, check the manufacturer’s guidance and make sure you understand which settings may be reset.
7. Review Camera Settings and Install Available Updates

Certain camera options may affect how your phone selects lenses, focuses, or processes photos. The exact settings vary across Samsung Galaxy, Google Pixel, Xiaomi, OnePlus, Motorola, and other Android devices.

Check these camera options

Open the Camera app settings and look for options related to:

  • Scene optimisation: Temporarily disable it if you suspect processing is affecting results.
  • Tracking autofocus: Test with this option enabled or disabled if your phone provides it.
  • Macro mode: Compare results with automatic macro switching on and off.
  • Lens selection or zoom controls: Check whether the phone is using the expected camera at the selected zoom level.
  • Camera reset: If available, restore the Camera app’s default settings.

Change one setting at a time and take another test photo. This helps you identify which change, if any, makes a difference.

Update the camera and system software

An outdated camera app or system component may contain bugs that affect focusing or lens switching.

  1. Open the Google Play Store and check for updates to your camera app, if it is distributed through the store.
  2. Open Settings > System update or the manufacturer’s equivalent.
  3. Install any appropriate official updates.
  4. Restart your phone.
  5. Test the camera again.

Not every manufacturer distributes its camera app through Google Play, so check your phone manufacturer’s official update tools when necessary.

8. Test the Camera in Another App

If the default Camera app still produces blurry photos, try a trusted alternative camera app from an official app store.

Take a picture of the same stationary subject under similar lighting. If the alternative app produces clear images, the problem may be related to the default Camera app or its settings.

However, this test is not definitive. Third-party apps may not have access to every physical lens, zoom option, or advanced camera feature. A lens that cannot be selected in another app is not necessarily defective.

If the problem started after installing a camera-related app, filter, or modification, temporarily disable or uninstall that software and retest the default camera.

Avoid installing unknown camera APK files from untrusted websites, especially when they request unnecessary permissions.

Troubleshooting Tips: When the Problem Persists

If none of the steps above fixes the blurry images, use these checks to narrow down the cause.

Restart the phone

Restarting can clear temporary system issues affecting camera services. After the phone starts again, open the Camera app and test each lens.

Check for physical damage

Inspect the camera glass for cracks, deep scratches, or condensation. If the phone was recently dropped or exposed to moisture, an internal camera component may have been affected.

Do not open the phone or attempt to adjust internal camera components yourself.

Use a simple test checklist

  • Clean the camera glass.
  • Remove the case and lens protector temporarily.
  • Test each zoom setting in bright light.
  • Tap the subject to focus.
  • Move farther away from close objects.
  • Force-stop the Camera app.
  • Clear its cache.
  • Check camera settings and official updates.
  • Restart the phone and repeat the test.

When should you contact support?

Consider contacting the manufacturer or a qualified repair service if:

  • One physical lens remains blurry in bright light.
  • The camera repeatedly hunts for focus on stationary objects.
  • You hear unusual clicking or grinding sounds from the camera module.
  • The camera glass is cracked or condensation appears inside the module.
  • The problem began immediately after a drop or repair.
  • The camera remains blurry after software troubleshooting.

Explain which zoom settings are affected and whether the problem occurs in every camera app. These details can help the technician identify the likely cause.

Conclusion

When an Android camera takes blurry photos only after switching lenses, the cause may be as simple as dirty camera glass, poor lighting, or an autofocus delay. In other cases, the selected lens may have a different minimum focusing distance, the camera app may be experiencing a temporary glitch, or a hardware component may need inspection.

Start by cleaning the camera glass, removing any obstructing accessories, and testing every lens in bright light. Then check autofocus, restart the Camera app, clear its cache, and install available official updates.

The most useful clue is whether the problem affects every lens or only one. If a particular camera consistently produces blurry images under good lighting while the others remain sharp, professional inspection may be the most practical next step.

By testing one change at a time, you can narrow down the cause of the Android camera blurry after switching lenses problem without immediately resorting to a factory reset or paying for an unnecessary repair.

Introduction

Have you noticed that your Android phone takes clear photos with its main camera but produces blurry images when you switch to the ultrawide or telephoto lens? You might see the picture become soft, lose detail, or struggle to focus for a few seconds after tapping a different zoom option. In some cases, the camera may repeatedly shift between clear and blurry images without settling on a sharp subject.

This problem can be frustrating, especially when you are trying to photograph moving objects, capture a landscape, or take close-up pictures. The good news is that blurry photos after switching camera lenses do not always indicate hardware damage. The issue may be related to autofocus behaviour, lighting conditions, fingerprints on the camera glass, camera app settings, or the way your phone changes between its available lenses.

Different Android phones use different camera systems. Some models have separate main, ultrawide, and telephoto cameras, while others rely on digital zoom or software processing for certain zoom levels. As a result, the steps that solve the problem on one phone may not work exactly the same way on another.

This guide explains how to troubleshoot the Android camera blurry after switching lenses problem using practical checks you can perform at home. Follow the steps in order, starting with the simplest solutions before considering more advanced troubleshooting.

1. Understand Why Your Android Camera Becomes Blurry After Switching Lenses

Before changing settings, it helps to understand what happens when you switch camera lenses.

Many Android phones automatically select a different camera depending on the zoom level, available light, and distance from the subject. For example, tapping 0.5x may activate an ultrawide camera, while selecting 3x on a phone with a dedicated telephoto camera may activate that lens.

Each camera can have different focus capabilities, sensor sizes, and image-processing behaviour. When you switch lenses, the phone may need a moment to adjust focus, exposure, and image processing.

Common reasons for blurry photos

The most frequent causes include:

  • Autofocus delays: The selected camera needs time to lock focus on the subject.
  • Dirty camera glass: Fingerprints, dust, or oily marks reduce image clarity.
  • Poor lighting: A secondary lens may perform worse in dim environments.
  • Minimum focusing distance: The selected camera cannot focus properly when the subject is too close.
  • Camera app glitches: Temporary software problems interfere with lens selection or focusing.
  • Physical damage: A scratched lens cover, damaged autofocus mechanism, or internal camera fault can affect sharpness.

A brief blur immediately after switching lenses can be normal. However, if the camera remains blurry after several seconds, repeatedly hunts for focus, or produces consistently unclear images with one particular lens, further troubleshooting is worthwhile.

2. Clean the Camera Glass and Remove Anything Blocking the Lens

One of the easiest causes to overlook is a dirty camera cover. Because many phones have several cameras grouped closely together, it can be difficult to notice which lens is affected.

Your main camera may remain clear while fingerprints or dust on the ultrawide or telephoto camera cause blurry results after switching lenses.

Step-by-step cleaning instructions

  1. Close the Camera app.
  2. Inspect the camera module under good lighting.
  3. Look for fingerprints, dust, oily marks, scratches, or moisture.
  4. Use a clean, soft microfiber cloth to gently wipe the camera glass.
  5. If you use a protective camera lens cover, check whether it is dirty, scratched, loose, or poorly aligned.
  6. Open the Camera app again and test each available lens.

Avoid using rough fabrics, abrasive cleaners, or excessive pressure. Do not spray liquid directly onto the camera module.

Check your phone case

Some protective cases have openings that do not align properly with every camera. A thick case, decorative camera ring, or poorly fitted lens protector may partially obstruct a secondary camera.

Remove the case temporarily and take a few test photos. If the images become clearer, inspect the case or lens protector before replacing it.

Tip: Clean the camera glass before testing any software changes. Otherwise, you may spend time adjusting settings when the actual problem is a simple obstruction.

3. Test Each Camera Lens Separately

If the camera becomes blurry only after switching lenses, identify which lens causes the problem. This makes troubleshooting much easier and helps distinguish a general camera app issue from a possible hardware fault.

How to test your Android camera

  1. Open the default Camera app.
  2. Find a stationary subject, such as a book cover, a product box, or a sign.
  3. Move to a well-lit location.
  4. Keep the phone at a comfortable distance from the subject.
  5. Take a photo using the default 1x setting.
  6. Switch to 0.5x, if available, and take another photo.
  7. Test 2x, 3x, or another available zoom setting.
  8. Compare the images at the same viewing size.

Not every zoom setting represents a separate physical lens. On some phones, 2x zoom uses a crop of the main camera image rather than a dedicated camera module.

What your results may indicate

  • Only the ultrawide camera is blurry: Check its glass, lighting performance, and focusing limitations.
  • Only the telephoto camera is blurry: Test in brighter conditions and at a greater subject distance.
  • Every lens becomes blurry temporarily: Investigate autofocus behaviour, camera app glitches, and software updates.
  • One lens is always blurry: A lens-specific hardware or software problem becomes more plausible.
  • The preview looks blurry but the saved photo is sharp: The issue may involve preview processing rather than the final image.

Do not judge a camera solely by comparing images taken at different zoom levels. Each camera may capture different amounts of detail, particularly in low light.

4. Give Autofocus Time to Lock on the Subject

Autofocus automatically adjusts the camera to make a subject appear sharp. When switching lenses, the phone may need to refocus because each camera has different focusing characteristics.

This can be particularly noticeable when photographing objects close to the phone.

Try the following focus test

  1. Open the Camera app and select the lens that produces blurry photos.
  2. Point the camera at a stationary object in good lighting.
  3. Tap the main subject on the screen to request focus.
  4. Keep the phone steady for two or three seconds.
  5. Take the picture once the subject appears sharp.

If the subject becomes clear after tapping the screen, the issue may be related to autofocus selection or the camera’s initial focus behaviour.

Move farther away from close objects

Different camera lenses have different minimum focusing distances. An ultrawide camera, telephoto camera, and main camera may not focus at the same distance.

For example, if you move your phone very close to a flower and switch from 1x to 3x, the new camera may be unable to focus at that distance.

Try moving the phone farther away and tapping the subject again. If the image becomes sharp, you may have encountered a focusing-distance limitation rather than a fault.

Some phones automatically switch to a macro-capable camera when you move close to an object. If your Camera app offers a macro control, test it both on and off.

When autofocus repeatedly hunts

If the image alternates between clear and blurry without settling, test a stationary subject in bright light. Persistent focus hunting across several attempts may indicate a camera software issue or a problem with the autofocus mechanism.

Avoid repeatedly shaking or tapping the phone to force it to focus.

5. Check Lighting Conditions Before Blaming the Lens

A secondary camera can produce noticeably softer images in dim environments. This happens because different camera modules may have smaller sensors, narrower apertures, or different image-processing capabilities.

When the available light decreases, the phone may increase exposure time, apply stronger noise reduction, or switch to another camera automatically.

Test the camera in bright daylight

Take the same photo in two conditions:

  • Bright conditions: Photograph a stationary subject near a window or outdoors in daylight.
  • Dim conditions: Photograph the same subject indoors under weaker lighting.

Compare the results after switching lenses.

If the secondary lens performs well in bright light but becomes blurry indoors, lighting limitations or longer exposure times may be contributing to the problem.

Keep the phone steady

Low-light photography can make even small hand movements visible in the final picture. Hold the phone with both hands and pause briefly before taking a photo.

If your Camera app offers a night mode, try it with a stationary subject. Remember that night mode may take longer to capture and process an image.

Also check whether the camera automatically switches to digital zoom in low light. Digital zoom enlarges part of an image and may reduce detail compared with a dedicated optical telephoto camera.

Important: If a lens remains consistently blurry in bright daylight while the other lenses produce sharp images, lighting alone is unlikely to explain the entire problem.

6. Restart the Camera App and Clear Its Cache

A temporary camera app glitch can interfere with focusing, lens switching, or image processing. Restarting the app is a useful next step if cleaning the lens and testing autofocus have not helped.

Force-stop the Camera app

Android menu names differ by manufacturer, but the general process is:

  1. Open Settings.
  2. Select Apps or Apps management.
  3. Find and open Camera.
  4. Tap Force stop.
  5. Confirm if prompted.
  6. Open the Camera app again and test the affected lens.

This closes the app so you can start a fresh camera session.

Clear the Camera app cache

If the issue continues:

  1. Open Settings.
  2. Go to Apps > Camera.
  3. Select Storage or Storage and cache.
  4. Tap Clear cache, if available.
  5. Reopen the Camera app and test the lenses again.

Clearing the cache removes temporary files. It is different from clearing storage or app data, which may reset camera preferences and other app settings.

Start with the cache option. Before clearing app data, check the manufacturer’s guidance and make sure you understand which settings may be reset.

7. Review Camera Settings and Install Available Updates

Certain camera options may affect how your phone selects lenses, focuses, or processes photos. The exact settings vary across Samsung Galaxy, Google Pixel, Xiaomi, OnePlus, Motorola, and other Android devices.

Check these camera options

Open the Camera app settings and look for options related to:

  • Scene optimisation: Temporarily disable it if you suspect processing is affecting results.
  • Tracking autofocus: Test with this option enabled or disabled if your phone provides it.
  • Macro mode: Compare results with automatic macro switching on and off.
  • Lens selection or zoom controls: Check whether the phone is using the expected camera at the selected zoom level.
  • Camera reset: If available, restore the Camera app’s default settings.

Change one setting at a time and take another test photo. This helps you identify which change, if any, makes a difference.

Update the camera and system software

An outdated camera app or system component may contain bugs that affect focusing or lens switching.

  1. Open the Google Play Store and check for updates to your camera app, if it is distributed through the store.
  2. Open Settings > System update or the manufacturer’s equivalent.
  3. Install any appropriate official updates.
  4. Restart your phone.
  5. Test the camera again.

Not every manufacturer distributes its camera app through Google Play, so check your phone manufacturer’s official update tools when necessary.

8. Test the Camera in Another App

If the default Camera app still produces blurry photos, try a trusted alternative camera app from an official app store.

Take a picture of the same stationary subject under similar lighting. If the alternative app produces clear images, the problem may be related to the default Camera app or its settings.

However, this test is not definitive. Third-party apps may not have access to every physical lens, zoom option, or advanced camera feature. A lens that cannot be selected in another app is not necessarily defective.

If the problem started after installing a camera-related app, filter, or modification, temporarily disable or uninstall that software and retest the default camera.

Avoid installing unknown camera APK files from untrusted websites, especially when they request unnecessary permissions.

Troubleshooting Tips: When the Problem Persists

If none of the steps above fixes the blurry images, use these checks to narrow down the cause.

Restart the phone

Restarting can clear temporary system issues affecting camera services. After the phone starts again, open the Camera app and test each lens.

Check for physical damage

Inspect the camera glass for cracks, deep scratches, or condensation. If the phone was recently dropped or exposed to moisture, an internal camera component may have been affected.

Do not open the phone or attempt to adjust internal camera components yourself.

Use a simple test checklist

  • Clean the camera glass.
  • Remove the case and lens protector temporarily.
  • Test each zoom setting in bright light.
  • Tap the subject to focus.
  • Move farther away from close objects.
  • Force-stop the Camera app.
  • Clear its cache.
  • Check camera settings and official updates.
  • Restart the phone and repeat the test.

When should you contact support?

Consider contacting the manufacturer or a qualified repair service if:

  • One physical lens remains blurry in bright light.
  • The camera repeatedly hunts for focus on stationary objects.
  • You hear unusual clicking or grinding sounds from the camera module.
  • The camera glass is cracked or condensation appears inside the module.
  • The problem began immediately after a drop or repair.
  • The camera remains blurry after software troubleshooting.

Explain which zoom settings are affected and whether the problem occurs in every camera app. These details can help the technician identify the likely cause.

Conclusion

When an Android camera takes blurry photos only after switching lenses, the cause may be as simple as dirty camera glass, poor lighting, or an autofocus delay. In other cases, the selected lens may have a different minimum focusing distance, the camera app may be experiencing a temporary glitch, or a hardware component may need inspection.

Start by cleaning the camera glass, removing any obstructing accessories, and testing every lens in bright light. Then check autofocus, restart the Camera app, clear its cache, and install available official updates.

The most useful clue is whether the problem affects every lens or only one. If a particular camera consistently produces blurry images under good lighting while the others remain sharp, professional inspection may be the most practical next step.

By testing one change at a time, you can narrow down the cause of the Android camera blurry after switching lenses problem without immediately resorting to a factory reset or paying for an unnecessary repair.

Related Posts

LEAVE A REPLY

Please enter your comment!
Please enter your name here

Related posts

Latest posts

Android Phone Charges Normally Until You Use It? Find Out Why Charging Slows Down

Have you ever plugged in your Android phone, noticed the battery percentage rising normally, and then watched charging slow down as soon as you...

Android Phone Keeps Disconnecting From Wi-Fi When the Screen Turns Off? How to Fix It

Your Android phone connects to Wi-Fi perfectly while you are using it, but something changes as soon as you press the power button. Messages...

How to Recognize Suspicious App Permissions Before Installing an App

Installing a new Android app is usually simple, but it is worth checking what the app wants to access before you tap Install. Some...